I still remember the delight of biting into something sweet around the holidays. That warm, buttery crunch always brought a smile. Now, I love recreating that feeling with my Adorable Valentines Day Oreo Pops Recipe: Sweet & Simple!
My first try at making anything similar was a disaster. I ended up with a sticky, crumbling mess that looked more like abstract art than a treat! My family politely declined to sample my “masterpiece.” Luckily, I’ve refined the process since then.
Now, creating Valentines Day Oreo Pops is a comforting tradition I truly cherish. It’s incredibly satisfying to see the smiles these delightful treats bring, making every holiday moment extra special and memorable.
Ingredients for Valentines Day Oreo Pops
- Oreo Cookies (1 family size package, about 36 cookies): The essential star and delicious base for these delightful Valentines Day Oreo Pops. Crush them finely for the best texture.
- Cream Cheese (8 ounces, full-fat, softened): This is the creamy foundation that binds the crushed Oreos together beautifully. Ensure it’s very soft for easy mixing.
- Unsalted Butter (2 tablespoons, softened): Adds a lovely richness and helps achieve the perfect pliable consistency for rolling your sweet treats. Use good quality butter.
- Powdered Sugar (1/4 cup, sifted): Sweetens the cream cheese mixture and helps create a smooth, delightful texture. Sifting prevents lumps and ensures even distribution.
- Vanilla Extract (1 teaspoon): Enhances all the sweet flavors, adding a comforting warmth to your Valentines Day Oreo Pops. Pure vanilla extract is always best.
- Fine Sea Salt (1/4 teaspoon): A tiny pinch perfectly balances the sweetness, elevating the overall flavor profile of these simple delights. Don’t skip this secret ingredient.
- White Chocolate Melting Wafers (12 ounces): Provides the smooth, dippable coating, making your Oreo pops look professional and appealing. Candy melts also work wonderfully here.
- Red Gel Food Coloring (1/2 teaspoon): Crucial for achieving that vibrant, festive Valentines Day red for some of your adorable pops. Gel colors won’t thin your chocolate.
- Pink Gel Food Coloring (1/2 teaspoon): Offers a softer, romantic hue for another batch of pops, adding lovely variety to your holiday display. Use sparingly for pastel shades.
- Vegetable Shortening (1 teaspoon, optional): Helps thin the melted chocolate slightly for a smoother, easier dipping experience. A little goes a long way for perfect coverage.
- Valentines Day Sprinkles (2 tablespoons, various shapes): The festive finishing touch, adding sparkle and charm to your adorable Valentines Day Oreo Pops. Have fun with different designs!
- Lollipop Sticks (20 count, 6-inch): The practical component that transforms these delicious balls into fun, easy-to-eat pops. Dip tips in chocolate before inserting.
- Parchment Paper (for lining baking sheets): Prevents sticking and makes cleanup a breeze, ensuring your beautiful pops don’t get damaged. Essential for a smooth process.
- Small Heart Candies (1 tablespoon, optional): Adds an extra layer of adorable decoration, perfect for making your Valentines Day treats even more special. Place them while chocolate is wet.
How to Make Valentines Day Oreo Pops
- Prep Mixture:
- Crush Oreo Cookies finely in a food processor or bag. In a separate bowl, beat softened cream cheese, butter, sifted powdered sugar, vanilla, and salt until smooth. This forms the delicious base for your Valentines Day Oreo Pops.
- Form Dough:
- Add the crushed Oreos to the cream cheese mixture. Mix thoroughly until a uniform, pliable dough forms. This is key for shaping perfect Valentines Day Oreo Pops. A sturdy rubber spatula works wonders here for combining ingredients effectively.
- Chill Balls:
- Roll the dough into 20 uniform balls, about 1-inch each. Insert a lollipop stick into each. Place them on parchment-lined baking sheets and chill in the freezer for 15-20 minutes until firm, ensuring they hold their shape.
- Melt Chocolate:
- Gently melt white chocolate wafers in a microwave-safe bowl or double boiler. Stir in vegetable shortening if using, for a smoother consistency. If you plan to color, divide the melted chocolate into separate bowls now.
- Dip & Decorate:
- Dip each chilled Oreo pop into the melted white chocolate, letting excess drip off. Work quickly! Immediately add red or pink gel food coloring swirls if desired, then sprinkle with Valentines Day sprinkles and small heart candies.
- Set & Serve:
- Place decorated Valentines Day Oreo Pops on parchment paper to set completely, or stand them upright in a foam block. Once the chocolate is firm, they are ready to delight! Store any extras in an airtight container.
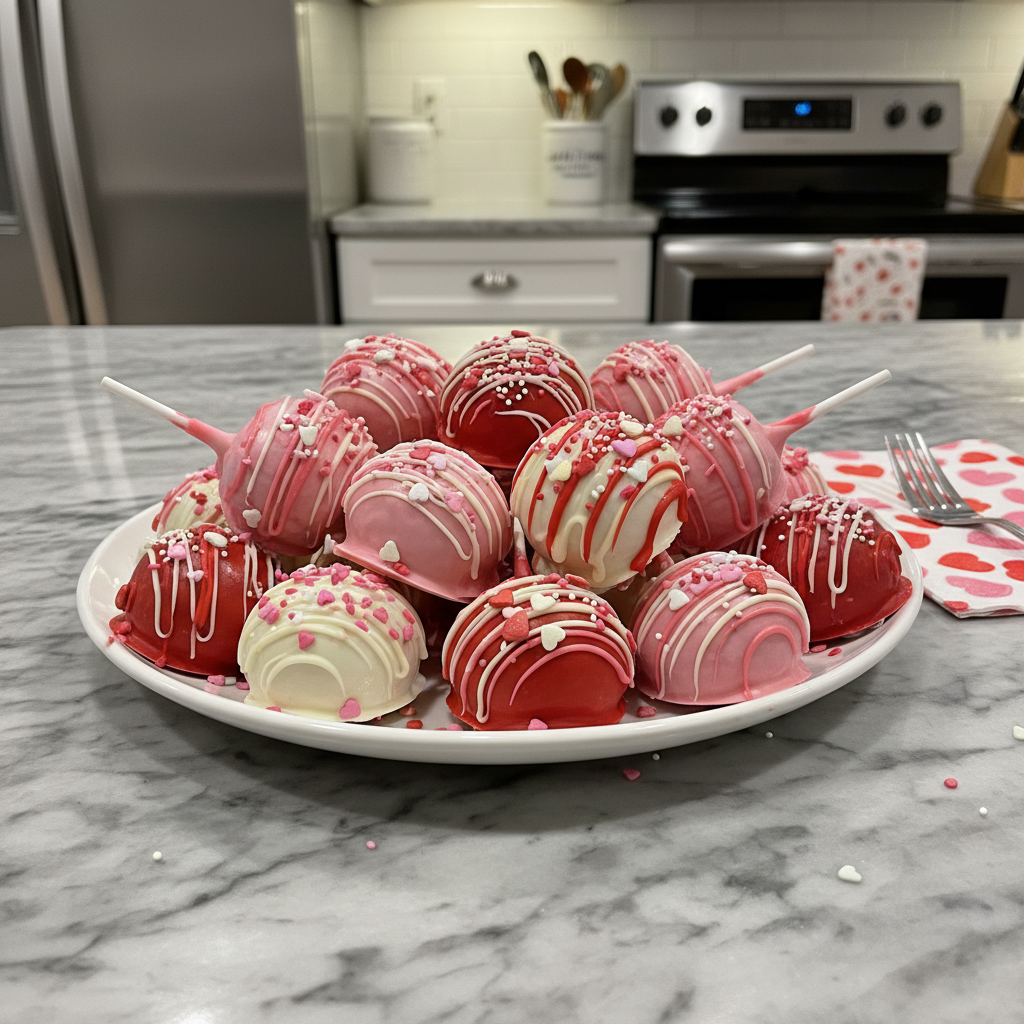
There’s something so deeply satisfying about seeing a tray full of perfectly formed Adorable Valentines Day Oreo Pops, each one ready for its festive dip. The kitchen, of course, usually tells a different story – a fine dusting of crushed Oreos on the counter, a stray smear of melted chocolate on my cheek, and the general delightful chaos of creation.
My fingers often end up sticky, a sweet badge of honor from the mixing bowl. Yet, as the vanilla and chocolate aromas begin to subtly fill the air, a sense of calm settles. For a moment, all the daily chaos melts away, replaced by the simple joy of making something beautiful. It’s in these small, sweet acts of creation that I find true comfort and connection.
How to Store Valentines Day Oreo Pops
To keep your Valentines Day Oreo Pops fresh, store them in an airtight container and refrigerate for up to 3-4 days. Don’t leave them out at room temperature for extended periods, or they’ll get soft and lose their delightful texture—a mistake I’ve made! Proper storage ensures they remain delicious and firm.
You can easily make the Oreo balls ahead of time; simply freeze them on parchment-lined sheets for up to 2 weeks before dipping. Just ensure they are firm before coating. When ready to serve, dip and decorate. If layering in a container, place parchment paper between layers to prevent sticking.

What to Serve with Valentines Day Oreo Pops
To serve these delightful Valentines Day Oreo Pops, arrange them on a festive platter. They are perfect when enjoyed chilled, offering a refreshing sweetness. For a charming display, consider standing them upright. These treats pair wonderfully with a warm cup of coffee or hot chocolate, making any moment extra special.
I personally love to serve them straight from the fridge with a steaming mug of cocoa. The cool, firm pop with the warmth of the drink creates a truly comforting and delicious contrast that I always enjoy.

Frequently Asked Questions
- → How do I prevent my Valentines Day Oreo Pops from crumbling when dipping?
-
Ensure your Oreo balls are thoroughly chilled in the freezer for 15-20 minutes until very firm. This prevents them from falling apart in the warm chocolate. Work quickly when dipping for best results, as the recipe advises.
- → Can I freeze the Oreo balls for these Valentines Day Oreo Pops ahead of time?
-
Yes, you absolutely can! Freeze the formed Oreo balls on parchment-lined sheets for up to 2 weeks. Just ensure they are firm before dipping and decorating. It’s a great make-ahead option for stress-free preparation.
- → Can I use regular chocolate chips instead of melting wafers for the coating?
-
While you can, melting wafers are highly recommended for a smoother, easier-to-work-with coating that sets beautifully. If using chocolate chips, add a teaspoon of vegetable shortening to aid melting and consistency, as I often do.
- → How long do these Adorable Valentines Day Oreo Pops stay fresh?
-
Store your finished Valentines Day Oreo Pops in an airtight container in the refrigerator for up to 3-4 days. Proper chilling maintains their firm texture and deliciousness. Avoid leaving them at room temperature for too long, a mistake I’ve made!
- → What if I don’t have a food processor to crush the Oreo Cookies?
-
No problem! Place the Oreo cookies in a sturdy Ziploc bag, seal it, and crush them finely using a rolling pin or the bottom of a heavy pan. Ensure they are very fine for a smooth dough consistency.

Adorable Valentines Day Oreo Pops Recipe: Sweet & Simple!
- Prep Time: 25 Minutes
- Cook Time: 5 Minutes
- Total Time: 30 Minutes
- Yield: 20 Servings 1x
- Category: Easy Dinner Recipes
Description
How to make Valentines Day Oreo Pops with crushed Oreos, cream cheese, and festive sprinkles that your loved ones will adore.
Ingredients
- Core Mixture:
- 1 family size package (about 36 cookies) Oreo Cookies
- 8 ounces full-fat cream cheese, softened
- 2 tablespoons unsalted butter, softened
- 1/4 cup powdered sugar, sifted
- 1 teaspoon vanilla extract
- 1/4 teaspoon fine sea salt
- Coating & Color:
- 12 ounces white chocolate melting wafers
- 1/2 teaspoon red gel food coloring
- 1/2 teaspoon pink gel food coloring
- 1 teaspoon vegetable shortening (optional)
- Embellishments & Tools:
- 2 tablespoons Valentines Day sprinkles (various shapes)
- 20 count (6-inch) lollipop sticks
- Parchment paper (for lining baking sheets)
- 1 tablespoon small heart candies (optional)
Instructions
- Prep Mixture: Crush Oreo Cookies finely in a food processor or bag. In a separate bowl, beat softened cream cheese, butter, sifted powdered sugar, vanilla, and salt until smooth. This forms the delicious base for your Valentines Day Oreo Pops.
- Form Dough: Add the crushed Oreos to the cream cheese mixture. Mix thoroughly until a uniform, pliable dough forms. This is key for shaping perfect Valentines Day Oreo Pops. A sturdy rubber spatula works wonders here for combining ingredients effectively.
- Chill Balls: Roll the dough into 20 uniform balls, about 1-inch each. Insert a lollipop stick into each. Place them on parchment-lined baking sheets and chill in the freezer for 15-20 minutes until firm, ensuring they hold their shape.
- Melt Chocolate: Gently melt white chocolate wafers in a microwave-safe bowl or double boiler. Stir in vegetable shortening if using, for a smoother consistency. If you plan to color, divide the melted chocolate into separate bowls now.
- Dip & Decorate: Dip each chilled Oreo pop into the melted white chocolate, letting excess drip off. Work quickly! Immediately add red or pink gel food coloring swirls if desired, then sprinkle with Valentines Day sprinkles and small heart candies.
- Set & Serve: Place decorated Valentines Day Oreo Pops on parchment paper to set completely, or stand them upright in a foam block. Once the chocolate is firm, they are ready to delight! Store any extras in an airtight container.